Formatted Drive Recovery
Recover files after quick or accidental formatting.
Written by the Refindo Recovery Team · Updated
A format is rarely as final as it looks. A quick format mostly rewrites the index, not the files themselves. As long as Windows or macOS can still read the device, Refindo can look past the empty file system: start with Quick Scan for surviving records, switch to Deep Scan once folders and names are gone, preview what matters, then recover it somewhere safe.
Quick answer
Files are usually still recoverable after a quick or accidental format, since a format mostly rewrites the index, not the files themselves. Stop using the drive and scan it before new data lands on top, then recover the files to a different disk.
What this covers
- Recover files after accidental quick format, partition reset, or format prompt mistakes
- Works with internal HDD/SSD devices, external drives, USB drives, and SD cards
- Supports NTFS, FAT32, exFAT, and APFS when the device is detectable by the operating system
- Preview documents, photos, PDFs, archives, and other common files before recovery
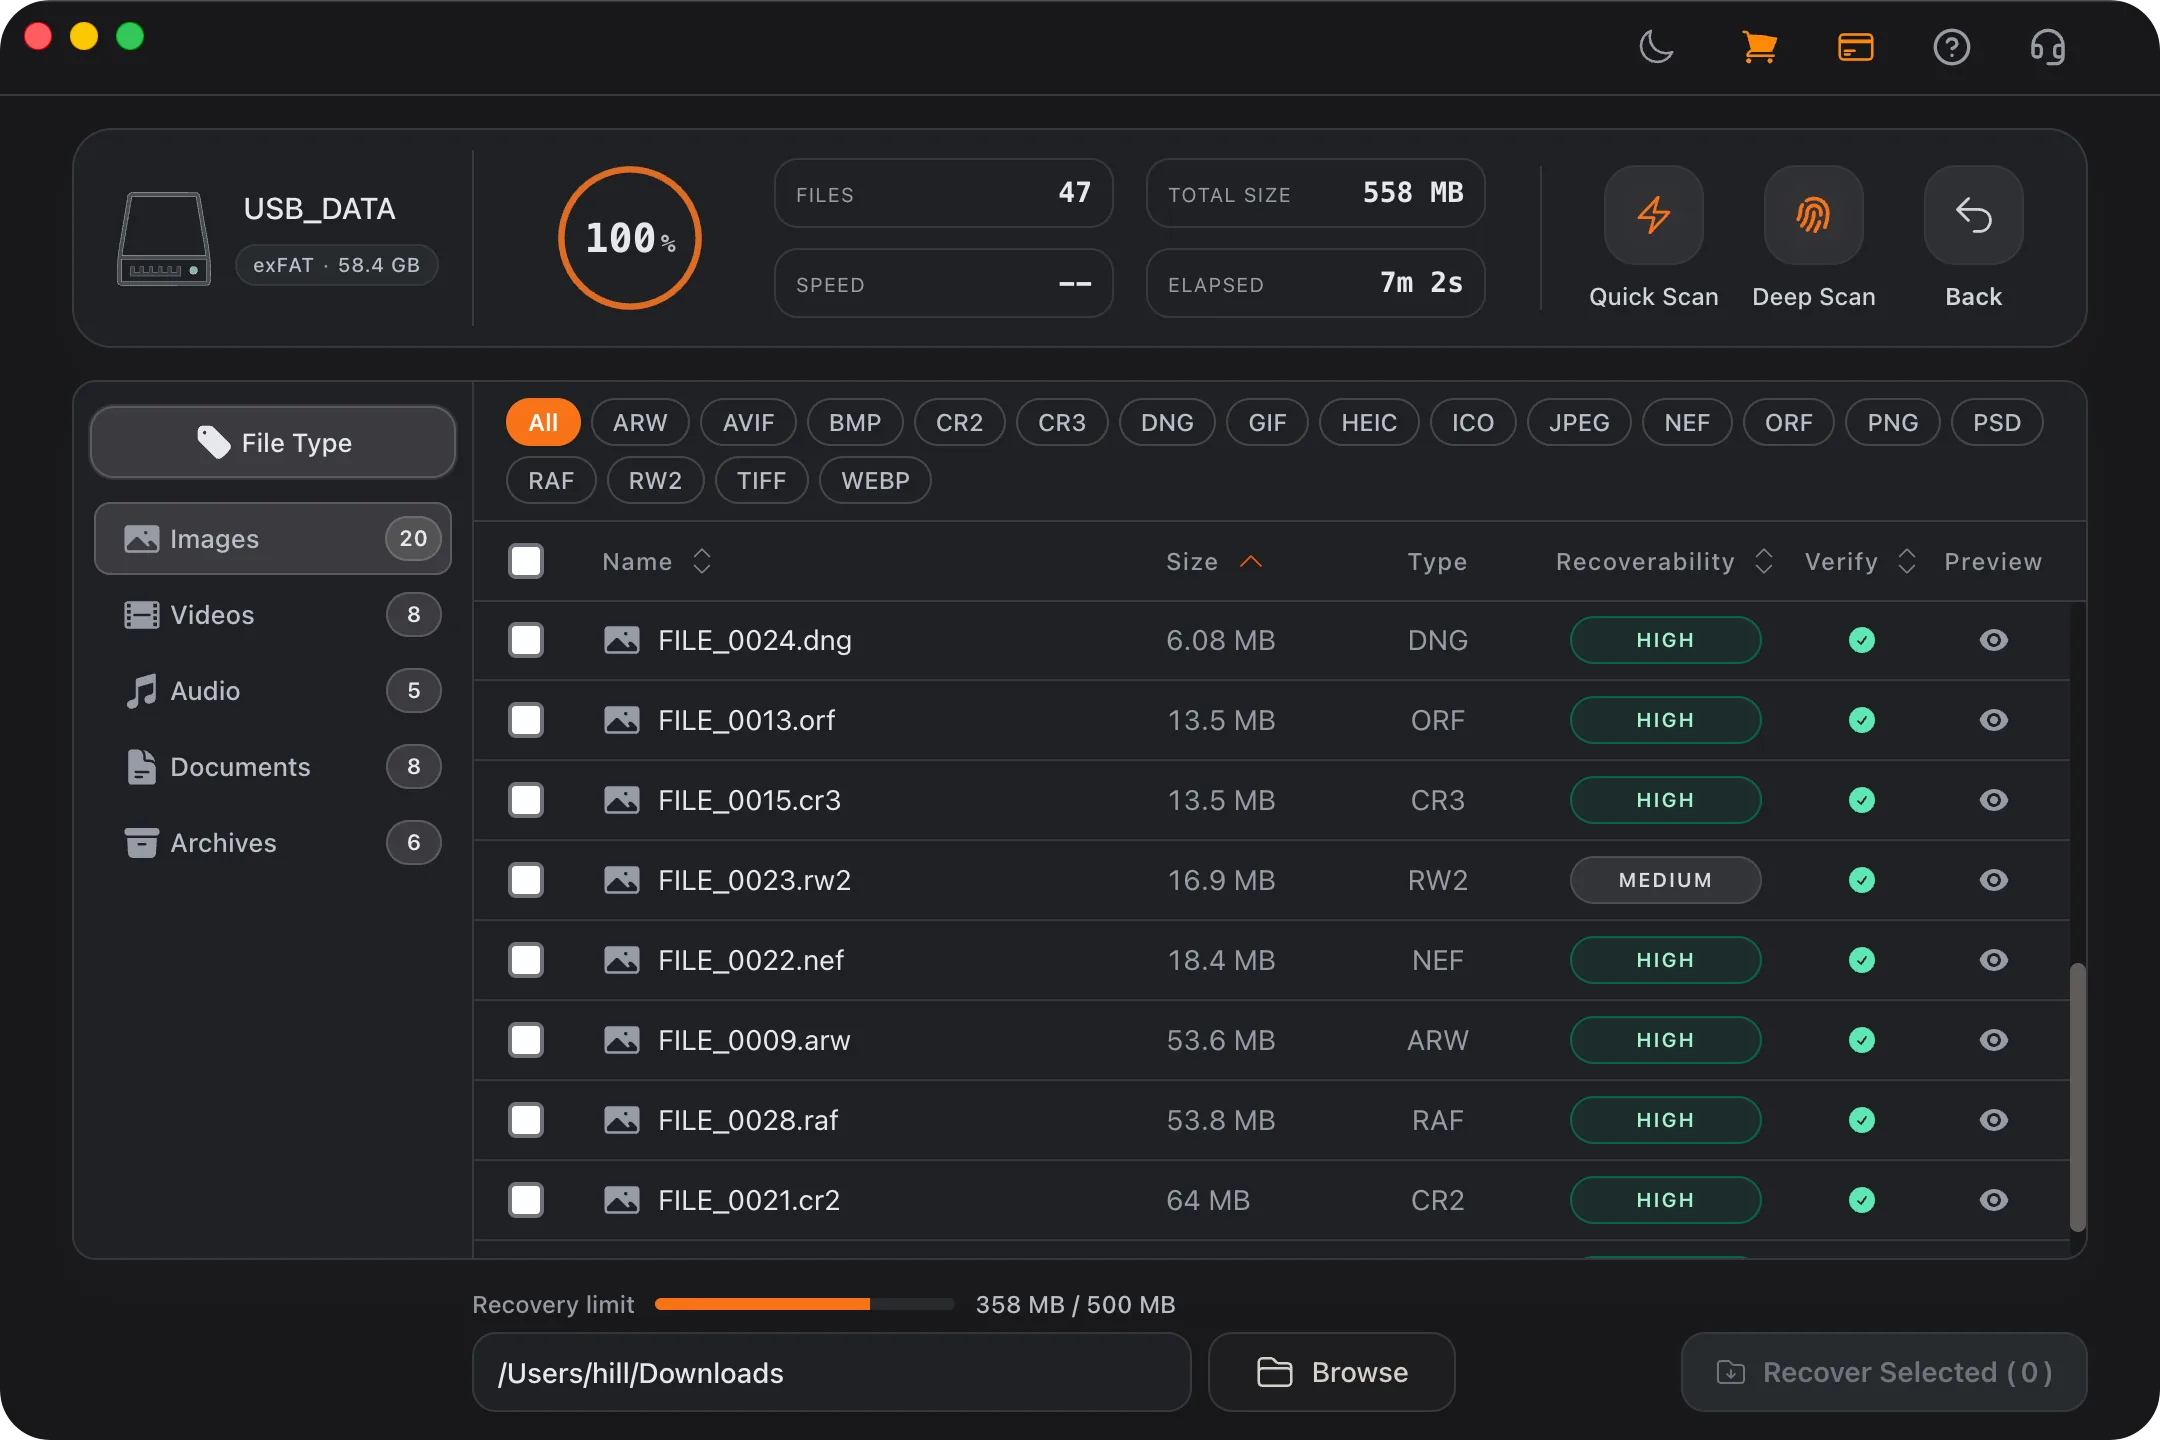
- Use Quick Scan for metadata-based results and Deep Scan for signature-based recovery
- Restore files to a separate destination to avoid overwriting remaining recoverable data
Recovery Workflow
- Stop using the formatted drive and connect it directly to your computer.
- Open Refindo, select the formatted volume or physical device, and run Quick Scan first.
- Review the folder tree and file type filters to identify important files.
- Run Deep Scan if the original folders, names, or target files are missing.
- Preview recoverable files to confirm that the content opens correctly.
- Recover selected files to a different disk, external drive, or safe local folder.
Best Practices
- Stop writing new data to the formatted drive immediately.
- Recover files to another disk to avoid overwriting remaining data.
- Prioritize critical files first while recovery chances are higher.
- Use preview to validate files before batch recovery.
- Avoid disk repair, initialization, partition changes, and file system conversion before scanning.
- Keep the drive connected through a stable cable or direct port during deep scanning.
Why a format is rarely the end of your data
The word "format" sounds final, but a quick format, the default on both Windows and macOS, barely touches your files. It writes a fresh, empty file system on top of the drive and marks the whole space as available. The old documents, photos, and videos stay right where they were, intact, until new data happens to land on top of them. That's why a drive you formatted an hour ago and haven't touched since is often almost fully recoverable.
A full format is a different story. On modern Windows it also scans the surface for bad sectors and, on many drives, writes zeros across it, and a secure erase or zero-fill writes over every block on purpose. Once the actual data has been overwritten, no software can bring it back. So the biggest factor in your odds isn't the format itself but what happened after it: a drive left alone recovers well, while a drive reused for new files loses ground with every write.
- Quick Scan works when the format left file system metadata behind.
- Deep Scan reaches the data when directory names and paths are gone.
- Every file written after the format overwrites a little more of the old data.
- Secure erase, zero-fill, or a full overwrite makes software recovery impossible.
The file system decides how clean the result is
How cleanly a format recovers depends a lot on what the drive was formatted as. NTFS keeps detailed records in the Master File Table, so a quick-formatted NTFS drive often gives back files with their original names and folders. FAT32 and exFAT keep leaner structures, so recovery there leans more on whether each file was stored in one contiguous piece; fragmented files are harder to reassemble once the directory is gone. APFS on macOS adds snapshots and container metadata that may or may not survive, which is why APFS formats often need a deeper, signature-based scan.
Refindo handles this by starting from the file system view when the metadata is still readable, then falling back to deep signature scanning when the original directory is incomplete. One practical wrinkle for cross-platform drives: a disk formatted on one OS can look different on the other, so scan it from the system that matches how it was used when you can.
- NTFS tends to preserve the most structure after a quick format.
- FAT32 and exFAT recovery depends more on files being contiguous.
- APFS often needs deep scanning once snapshots and volume metadata are stale.
- A cross-platform drive may look different on Windows and macOS after formatting.
SSDs format differently, and forget faster
On a hard drive or memory card, a quick format leaves the old blocks sitting there until new writes replace them, so time is on your side. On an SSD it often isn't. If the drive supports TRIM, formatting or deleting can trigger the controller to wipe the freed blocks in the background within seconds to minutes, and once those blocks are cleared the data is genuinely gone, not hidden, gone. That makes a formatted SSD the most time-sensitive case of all.
So treat a formatted SSD as an emergency: stop using it right away, don't install the recovery tool onto it, and scan before the controller finishes its housekeeping. And whatever the drive type, never recover back onto the source, since saving restored files to the same drive can overwrite the ones you haven't pulled off yet.
- TRIM can clear a formatted SSD's freed blocks within minutes.
- External SSD behavior varies with the enclosure and OS TRIM support.
- HDDs and memory cards hold old blocks until new writes overwrite them.
- Recovering to the source drive risks overwriting data still waiting to be saved.
Formatted Drive Recovery Guidance
Confirm the drive is visible before anything else
Software recovery can only work if the operating system still exposes the device so the tool can read its sectors. On Windows, open Disk Management and check that the drive appears with the right capacity and disk number; on macOS, check Disk Utility. A drive that shows the correct size is a good sign the hardware is healthy and only the file system got reset. One that reports the wrong capacity, keeps disconnecting, or never appears at all is flagging a hardware problem that more scans won't fix, and if the system offers to initialize or erase it, cancel and scan first.
Freeze the drive the moment you realize
The most damaging thing you can do after an accidental format is keep using the drive. Don't reinstall software onto it, copy files to it, download installers, run disk repair, create a new partition, or convert the file system. Every one of those writes can replace the old data recovery depends on. It's a simple rule but an unforgiving one: from the moment you notice, the formatted drive is evidence to be read, not storage to be used.
Let the preview prove it before you trust it
A formatted-drive scan, especially a Deep Scan, can return files without their original paths and occasionally with imperfect contents. Refindo groups verified Deep Scan recoveries by type and keeps damaged or unverified files in Needs Review. The preview is how you tell clean results from partial ones: open the important documents, photos, PDFs, spreadsheets, and archives from the results before you commit to a big batch. If they render correctly, the scan is reliable; if they come back broken, you've learned the data was already overwritten without wasting time restoring thousands of dead files.
Recover the irreplaceable first
When the source drive might be unstable or the data might be partly overwritten, order matters. Start with the files you can't recreate, business documents, family photos, original video, source code, archives, and recover a small, verified set of those first. Confirm they open from the destination drive, then move on to the larger, less critical folders. That puts your best odds on the files that matter most, instead of spending the drive's remaining reliability on bulk you could replace.
Frequently Asked Questions
Can I recover files after formatting a drive?
In many cases, yes. If the formatted drive has not been heavily overwritten, quick scan and deep scan can still discover recoverable files.
Which file systems are supported for formatted recovery?
Refindo supports NTFS, FAT32, exFAT, and APFS on supported Windows and macOS systems.
Should I keep using a formatted drive before recovery?
No. Stop writing new data to that drive immediately to reduce overwrite risk and improve recovery success.
Is quick format easier to recover than full format?
Usually, yes. A quick format often removes file system records without immediately erasing every old file block, while a full format or heavy reuse can overwrite more data.
Can formatted SSD files be recovered?
SSD recovery depends heavily on TRIM, the file system, and how much the drive has been used after formatting. If TRIM has cleared the old blocks, software recovery may find fewer usable files.
Can I recover the original folder structure?
Sometimes. Quick Scan may preserve more paths when metadata remains. Deep Scan may recover files by signature when paths or original names are no longer available.
Should I run disk repair before formatted recovery?
Avoid repair tools before scanning. Disk repair, initialization, partition changes, or copying files can write to the drive and reduce recovery chances.
Where should recovered files be saved?
Save recovered files to a different physical drive or another safe location, never back to the formatted drive you are scanning.
Start with a free scan
Check recoverable files first, then decide whether to proceed with recovery, and save results to a separate drive.