
Mac Data Recovery
Recover deleted files from APFS volumes, external drives, USB drives, and SD cards.
Written by the Refindo Recovery Team · Updated
Most Mac data loss happens in a few familiar moments: a file deleted in a hurry, a Trash emptied too soon, an APFS volume that vanished, an external drive that won't mount. Refindo handles all of them, as long as macOS can still read the source. You scan the drive, check your files in the preview before you commit, and save the recovered copies to a separate disk.
Quick answer
On a Mac you can usually recover files after a hurried delete, an emptied Trash, a vanished APFS volume, or an external drive that won't mount, as long as the disk is still detectable. Stop writing to it and scan the volume to preview and recover your files to a separate drive.
What this covers
- Recover deleted files after Trash was emptied
- Scan APFS, exFAT, FAT32, and supported readable volumes
- Works with internal Mac volumes, external HDD/SSD, USB drives, and SD cards
- Built for macOS 12+ workflows on Apple Silicon and Intel Macs
- Preview photos, documents, PDFs, and other supported files before recovery
- Quick Scan and Deep Scan for different Mac data loss cases
Mac external drive problems
External drive searches usually split into three cases: the Mac does not recognize the drive, Disk Utility sees it but will not mount it, or a Samsung portable SSD is locked or unstable. Use the matching guide before erasing, initializing, or running First Aid.
Recovery Workflow
- Stop writing new data to the source volume or external drive.
- Cancel erase, initialize, or repair prompts until files are checked.
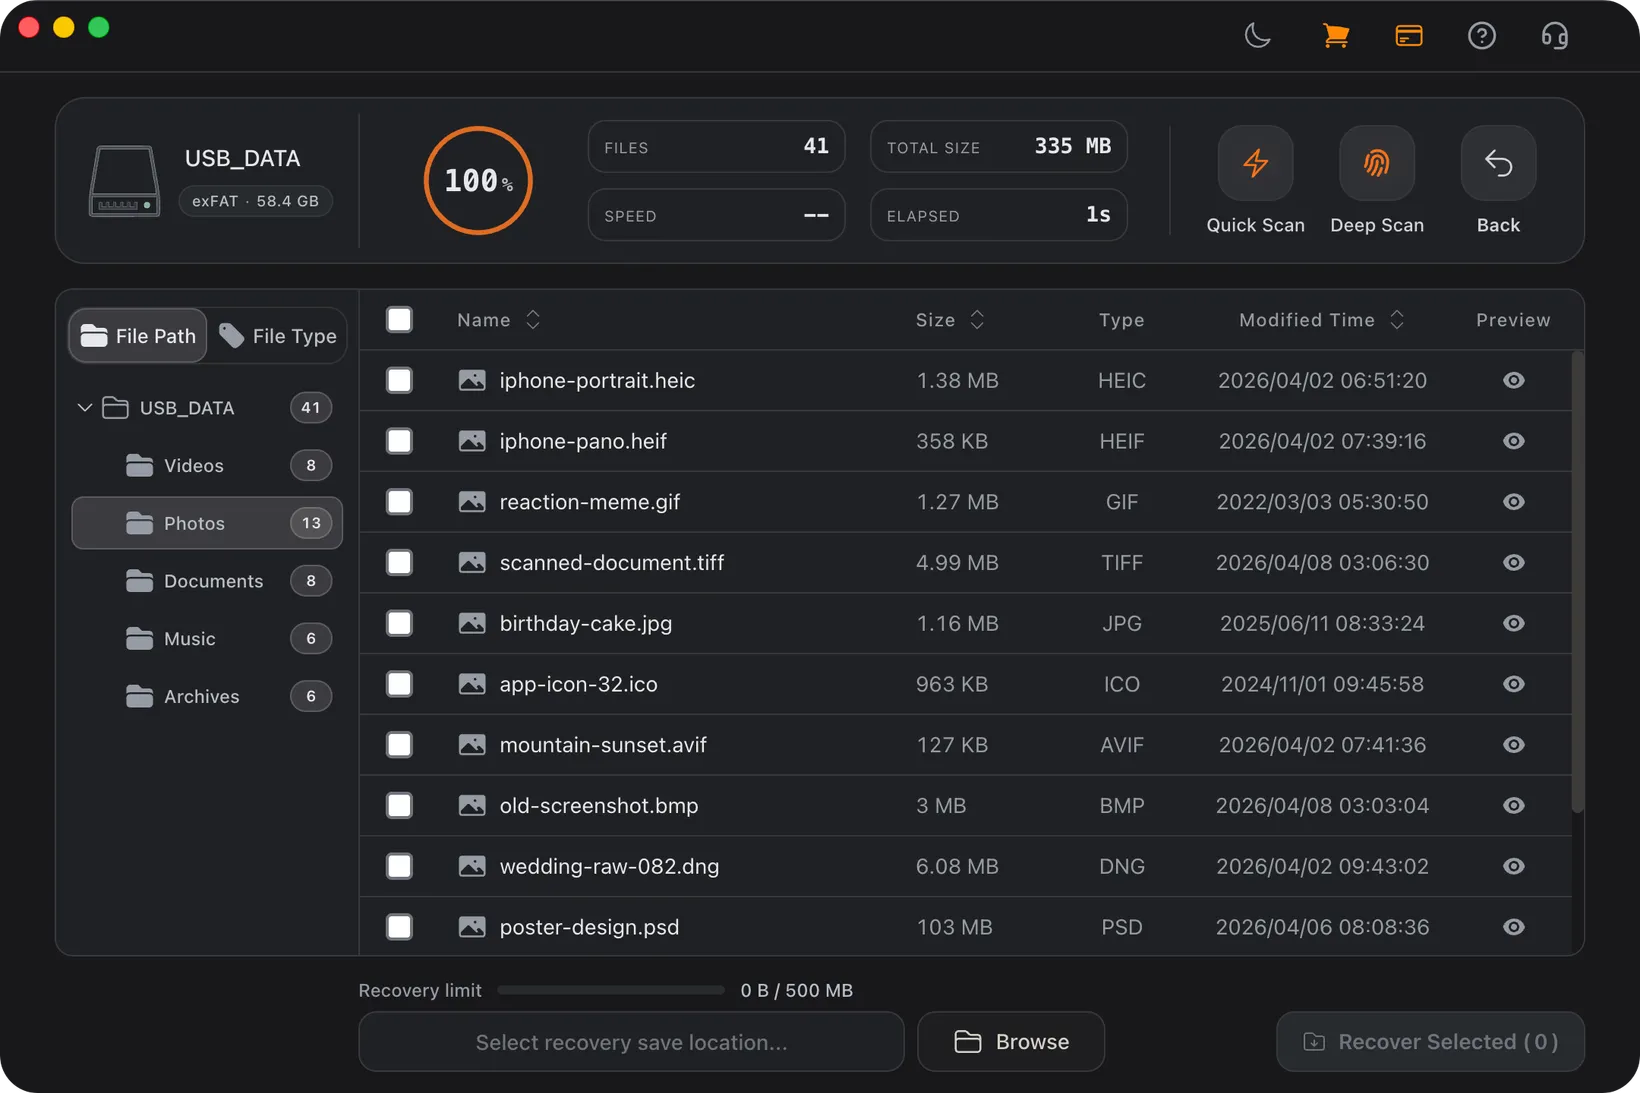
- Open Refindo and select the Mac volume or external device.
- Run Quick Scan, then Deep Scan if important files are missing.
- Preview recoverable files and recover them to a different destination.
Best Practices
- Recover to a separate disk, not the source Mac volume.
- Avoid repeated Disk Utility First Aid attempts before scanning.
- Check whether external drives appear with the correct capacity.
- Use a direct cable for external SSDs and avoid unstable hubs.
- Unlock encrypted drives with the correct password before scanning.
- Treat SSD TRIM as a time-sensitive limit after deletion.
How APFS changes Mac recovery
Every Mac since macOS High Sierra uses APFS by default, and it behaves nothing like the HFS+ era it replaced. APFS is a copy-on-write file system built around containers, snapshots, clones, and tight SSD integration. All of those features change what recovery can reach, so the first job is figuring out which layer is still intact: the physical device, the APFS container that pools the storage, the individual volume, or the metadata that maps file names to data blocks.
When you delete a file, APFS drops its directory record but doesn't immediately erase the blocks underneath. On a spinning external HDD those blocks can survive for weeks. On a Mac internal SSD they often don't, because macOS issues TRIM and the controller can reclaim the freed blocks in seconds to minutes. That's why "I only deleted it an hour ago" already hurts your odds on the system drive. Timing matters more than anything else in Mac recovery.
FileVault adds one more gate. An encrypted volume only gives up readable files if the software can decrypt it first, so you need to unlock it with its password or recovery key before a scan sees anything but ciphertext. And if the encryption metadata itself is damaged, even the right password might not be enough.
- Deleted files are recoverable while their blocks have not been reused or cleared by TRIM.
- Scan an unmounted APFS volume before you erase, repair, or repartition it.
- Unlock FileVault volumes with the password or recovery key before scanning.
- Snapshots can sometimes help, but macOS prunes them on its own, so never count on one being there.
External drives, enclosures, and the connection itself
A big share of Mac data loss never touches the internal disk at all. It happens on external HDDs, SSDs, USB sticks, and SD cards formatted as APFS or exFAT. With externals, the connection is part of the diagnosis. A drive that mounts on and off, drops out mid-copy, or reports the wrong capacity is often fighting a marginal cable, a USB-C-only hub negotiating the wrong protocol, or an enclosure that can't hold a stable link, rather than failing flash.
So before you assume the worst, rule out the easy faults. Plug the drive straight into a Thunderbolt or USB-C port with a cable you trust, skip hubs and adapters, and keep it still while it reads. If Disk Utility can see the device but Finder won't mount the volume, that usually means damaged file system metadata, not dead hardware. That's exactly the case where a read-only scan recovers files a reformat would have destroyed.
- If Disk Utility sees the device but Finder won't mount it, scan before erasing.
- Connect external SSDs directly over Thunderbolt or USB-C, with no unpowered hubs in between.
- Recover to a separate drive before you reformat or reuse the source.
- If the drive keeps disconnecting or reports the wrong size, stop. That's a hardware signal.
Mac Recovery Guidance
Scan the source, not the symptom
Recovery only works on the device that actually held the data. If files were deleted from an external drive, scan that external drive, not the internal disk you happen to be sitting in front of. And if you emptied the Trash for files that lived on the internal Mac volume, here's the awkward part: the safest scan comes from booting another Mac, or running Refindo off a separate drive. Every minute the system volume stays in use, background writes from Spotlight, iCloud, and app updates are competing for those freed blocks.
Never take the "initialize" prompt on a drive you care about
When macOS can't parse a volume, it offers to initialize or erase the disk, and the wording makes that sound like a fix. It isn't. Initializing lays a fresh, empty file system over the structures a scan still needs, and on an APFS container it can take down every volume inside it at once. Cancel the prompt, leave the disk exactly as it is, and scan before you let Disk Utility or First Aid near it.
A name in a list isn't proof the file is there
A long list of "recoverable" file names doesn't mean much until you can actually open them. Refindo previews photos, documents, PDFs, and other supported formats straight from the scan results, so you can see whether a file is really intact, not truncated or overwritten, before you commit to a full recovery. Check a small, important batch first. If those open cleanly, the rest of the scan is much more likely to be trustworthy.
Frequently Asked Questions
Can Refindo recover deleted files on Mac?
Yes, when the deleted data has not been overwritten or cleared by storage maintenance, Refindo can scan supported Mac volumes and preview recoverable files.
Does Mac data recovery support APFS?
Refindo supports APFS scanning when the device is readable by macOS. APFS deletion, formatting, encryption, and SSD TRIM can affect recovery results.
Can I recover files from an external drive on Mac?
Yes. If the external hard drive, SSD, USB drive, or SD card appears in macOS with a readable capacity, scan before erasing or repairing it.
Can files be recovered after emptying Trash on Mac?
Often, yes, if the original storage blocks have not been overwritten. Scan the original drive where the files were stored.
Does Refindo work on Apple Silicon and Intel Macs?
Refindo supports macOS 12+ on modern Mac systems, including Apple Silicon and Intel Mac workflows.
Can FileVault or encrypted APFS drives be recovered?
Encrypted drives require the correct password or recovery key before files can be scanned. Refindo does not bypass encryption.
Where should recovered Mac files be saved?
Save recovered files to a different internal or external drive, not back to the same Mac volume or external disk being scanned.
Start with a free scan
Check recoverable files first, then decide whether to proceed with recovery, and save results to a separate drive.