External Hard Drive Recovery
Recover files from drives that are not showing up, not mounting, RAW, unreadable, or formatted.
Written by the Refindo Recovery Team · Updated
External drive recovery starts by preserving the current state of the disk. If macOS or Windows can still detect the HDD, SSD, USB enclosure, or portable drive, Refindo can scan supported NTFS, FAT32, exFAT, and APFS volumes, preview recoverable files, and recover them to a separate destination before repair tools rewrite metadata.
Quick answer
If an external drive is not showing up, not mounting, RAW, unreadable, or was formatted, your files are usually still recoverable while the computer can detect the disk. First identify whether this is a visibility, mount, file system, or hardware symptom, then scan before repair or erase actions.
What this covers
- For external hard drives not showing up, not mounting, unreadable, formatted, RAW, or missing files
- Clear paths for Mac external drives that are missing from Finder, greyed out in Disk Utility, or not recognized
- Supports common file systems: NTFS, FAT32, exFAT, APFS
- Quick Scan for metadata-based results and Deep Scan for damaged or formatted volumes
- Preview images, PDF, text, and selected Office files before recovery
- Local recovery workflow with scan, preview, and recovery on your computer
Match the symptom before you repair
The safest recovery path depends on what macOS or Windows can still see. Start with the exact symptom before running repair tools, because a not-showing-up drive, a not-mounting volume, and a device that appears only in Disk Utility need different first steps. Use the cards below to move from this overview into the most precise Mac external-drive guide for your situation.
Recovery Workflow
- Stop using the external drive and do not format, repair, or copy new files to it.
- Check whether the drive appears in Finder, Disk Utility, System Information, or Disk Management.
- Run Quick Scan first when the drive is detectable and metadata may still exist.
- Use Deep Scan for formatted, RAW, unreadable, or unmountable volumes.
- Preview important files and recover them to another internal or external drive.
Best Practices
- Connect the drive directly or use a powered hub for spinning external HDDs.
- Avoid First Aid, CHKDSK, erase, initialize, or partition repair before scanning.
- Recover to another disk to reduce overwrite risk on the source drive.
- Stop self-recovery if the drive clicks, beeps, reports the wrong capacity, or disconnects repeatedly.
Read the symptom: not showing up vs. not mounting
External drive trouble sits at one of three layers, and figuring out which one saves you from the wrong fix. If the drive doesn't appear anywhere, not in Disk Management, Finder, Disk Utility, or System Information, the problem is usually below the file system: a cable, a port, an unpowered hub, the enclosure bridge that turns the bare drive into USB, or the device itself. If it shows in System Information or Disk Management but not in Disk Utility or File Explorer, suspect the bridge or device firmware. And if it shows in Disk Utility but the volume won't open in Finder, the hardware is alive and the file system is the problem.
That last case is the one recovery software is made for. A detected-but-unmountable volume can be scanned at the device level even though the OS refuses to mount it normally, which means the files are reachable exactly when it looks like they're not. If the drive is completely missing from Finder, start with the visibility guide. If Disk Utility can see the device or volume but Finder cannot open it, use the unmounted-volume guide.
- Mac is not recognizing the external hard drive anywhere: check cable, port, power, hub, and enclosure first.
- Appears in System Information but not Disk Utility: suspect the enclosure bridge or firmware.
- Appears in Disk Utility but not Finder: suspect a mount, file system, or visibility problem.
- Mounts but files are missing: scan before saving anything new to the drive.
Where software ends and a hardware lab begins
Recovery software reads sectors. It works when the drive is still electrically healthy enough for the OS or the tool to reach those sectors: deleted files, a formatted volume, a RAW partition, an unreadable file system, an unmountable volume. None of those are hardware faults. They're the file system misrepresenting what's underneath.
A mechanically failing drive is a different problem, and scanning it anyway can make things worse. Clicking, grinding, or beeping points to head or motor trouble; a wildly wrong reported capacity points to a controller fault; repeated disconnects under load mean the drive can't sustain reads. Every extra power cycle on a dying drive can cost you data. When you see those signs, stop and have the drive imaged or recovered professionally instead of running another scan.
- Use software for deleted files, formats, RAW volumes, and unmountable file systems.
- Get hardware help for clicking, grinding, beeping, wrong capacity, or repeated disconnects.
- On a large or unstable drive, recover the most important folders and file types first.
HDD and SSD fail on different clocks
The kind of external drive you have changes how fast you need to move. A spinning HDD tends to fade gradually. It may get slower, throw the occasional read error, or struggle with specific sectors before it fails outright, which often leaves a window to recover most of the data if you act before the bad sectors spread. Deleted data on an HDD can also linger a long time, because nothing erases the old blocks until new writes land on them.
An external SSD is less forgiving after a deletion. If the enclosure and OS support TRIM, the controller can reclaim freed blocks in the background and the deleted data is gone for good, sometimes within minutes. SSDs also tend to fail more abruptly than HDDs. Either way the rule is the same: recover to a different destination, never back onto the source, because writing to a drive you're still reading is the fastest way to overwrite what you came for.
- Spinning HDDs fade gradually, so bad sectors are an early cue to recover now.
- External SSDs lose deleted data quickly once TRIM and controller cleanup run.
- Recover both HDDs and SSDs to another destination, never back to the source.
Choose the Right External Drive Recovery Path
Drive not showing up on the desktop
Start by finding the lowest layer that still sees the drive. On a Mac, check Disk Utility and System Information; on Windows, check Disk Management. A drive that shows in System Information or Disk Management but not in Disk Utility or File Explorer points to cable, power, enclosure, or device-level trouble, so try a different cable and a direct port before anything else. A drive the system clearly detects but won't mount is a file system problem, and that's the moment to scan rather than repair.
Detected but will not mount
When macOS or Windows sees the external drive but the volume refuses to mount, the temptation is to hammer it: repeated mount attempts, First Aid loops, chkdsk, force-mount commands. Don't. Each of those can rewrite the directory records and file content a scan still needs. Take a read-only scan of the current state first, recover what matters to another disk, and only then run the repair tools that make the volume usable again.
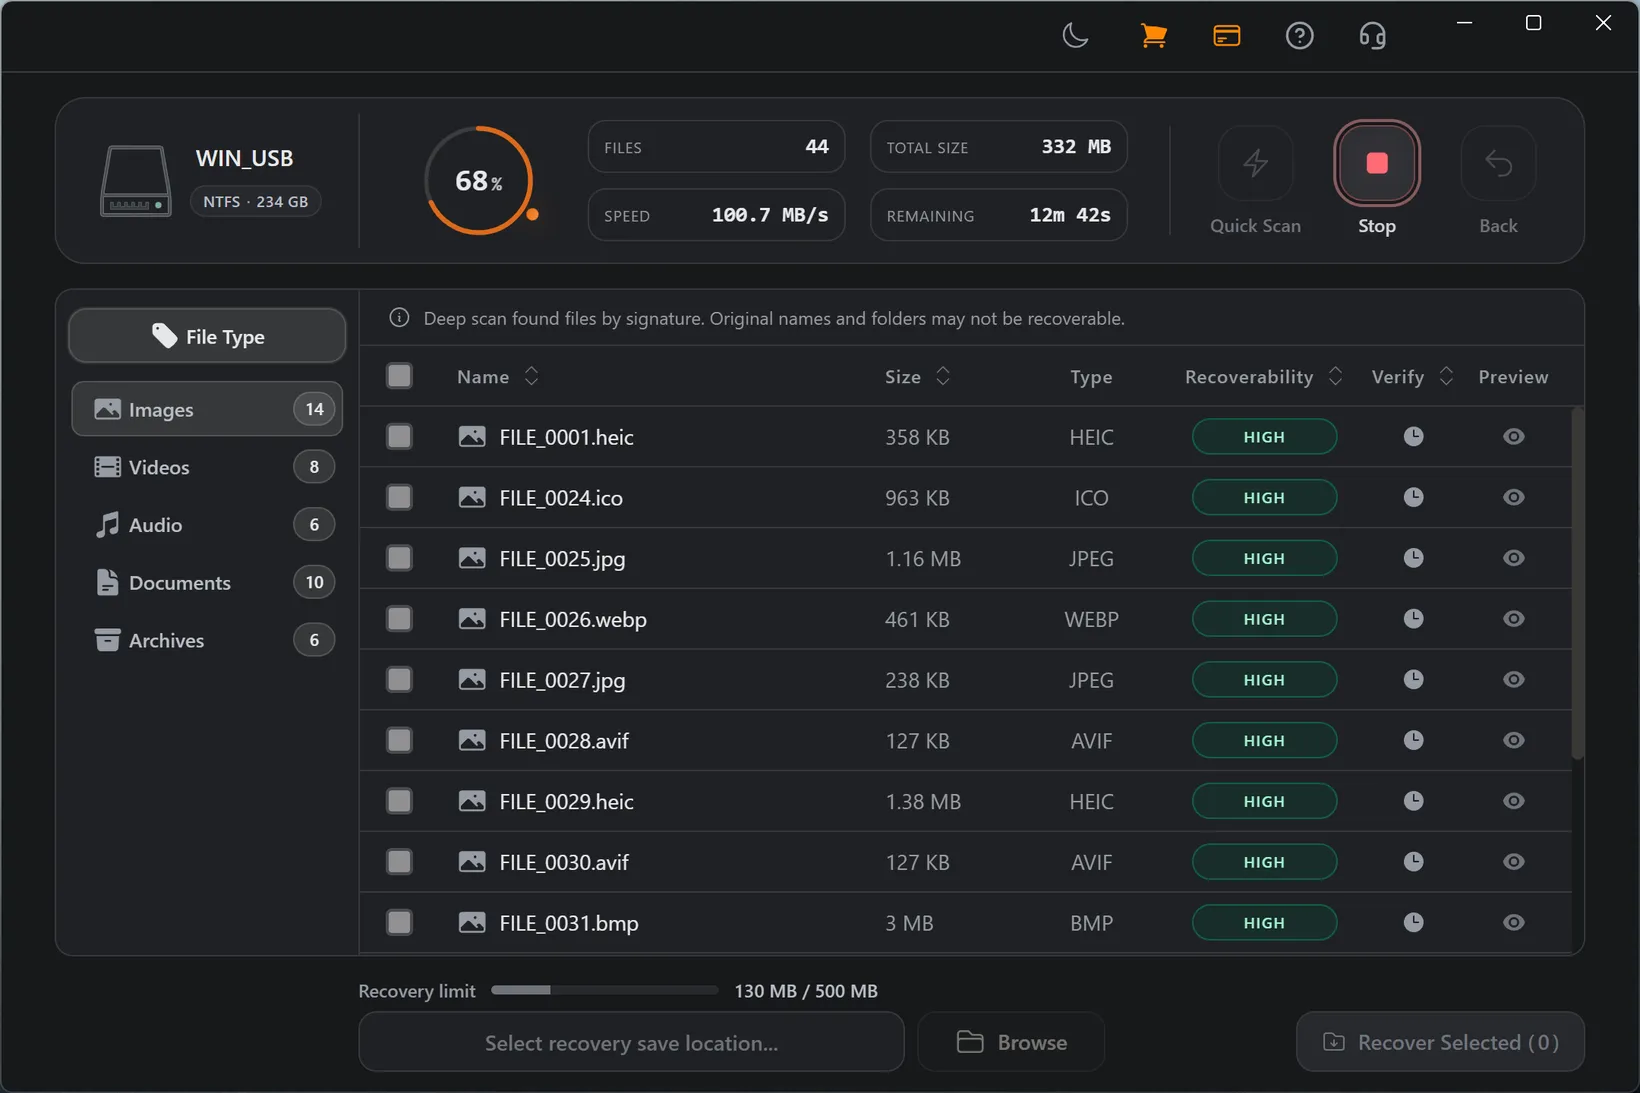
Formatted, RAW, or unreadable
A drive that was formatted, shows as RAW, or triggers an unreadable-disk prompt has usually lost its file system header, not its data. The wrong response is to format again to "make it work," since that writes a new, empty structure over the old one. Run a Deep Scan instead. It reads past the broken or replaced file system and rebuilds files from their content, and you save everything it finds to a separate destination.
Mounts fine, but files are gone
If the drive mounts normally and the files just vanished, deleted, moved, or missing after a transfer error, the clock starts the moment you notice. Stop using the drive right away, because continued writes are what overwrite recoverable data. Quick Scan gives the best shot at getting files back with their original names and folders while the metadata survives; Deep Scan reaches more content when the directory layer is already incomplete.
Frequently Asked Questions
Can I recover files from an external hard drive that is not showing up?
Often, yes, if the external drive is still detectable in Disk Utility, Disk Management, System Information, or by the operating system at the device level. If the drive clicks, beeps, or disconnects repeatedly, stop and check the hardware path first.
What is the difference between not showing up and not mounting?
Not showing up means the drive is missing from Finder or File Explorer and may only appear in lower-level tools such as Disk Utility, System Information, or Disk Management. Not mounting means the system detects the drive or volume but cannot open it normally.
Should I run First Aid, CHKDSK, or format the drive first?
No. Repair and format tools can write new file system structures to the source drive. If the files matter, scan and preview recoverable data before repair or formatting attempts.
Should I use Quick Scan or Deep Scan first?
Start with Quick Scan when the file system metadata may still exist. Use Deep Scan for formatted drives, RAW or unreadable volumes, missing partitions, or cases where Quick Scan does not find the files you need.
Can I recover files back to the same external drive?
It is strongly recommended to recover files to a different drive to avoid overwriting unrecovered data.
Where does external drive recovery run?
Scanning, preview, and recovery happen on your computer, and recovered files should be saved to another local destination.
Start with a free scan
Check recoverable files first, then decide whether to proceed with recovery, and save results to a separate drive.